When people think of siding, traditional cedar clapboards are probably what comes to mind. Most other horizontal siding is an emulation of this classic material.
Clapboards are installed so the uppers lap the lowers from 1 in. to 2 in. Lapping them at more than 1 in. enables some variation in the exposure. For example, clapboards intended for a 4-in. exposure measure 5 1⁄4 in. wide.
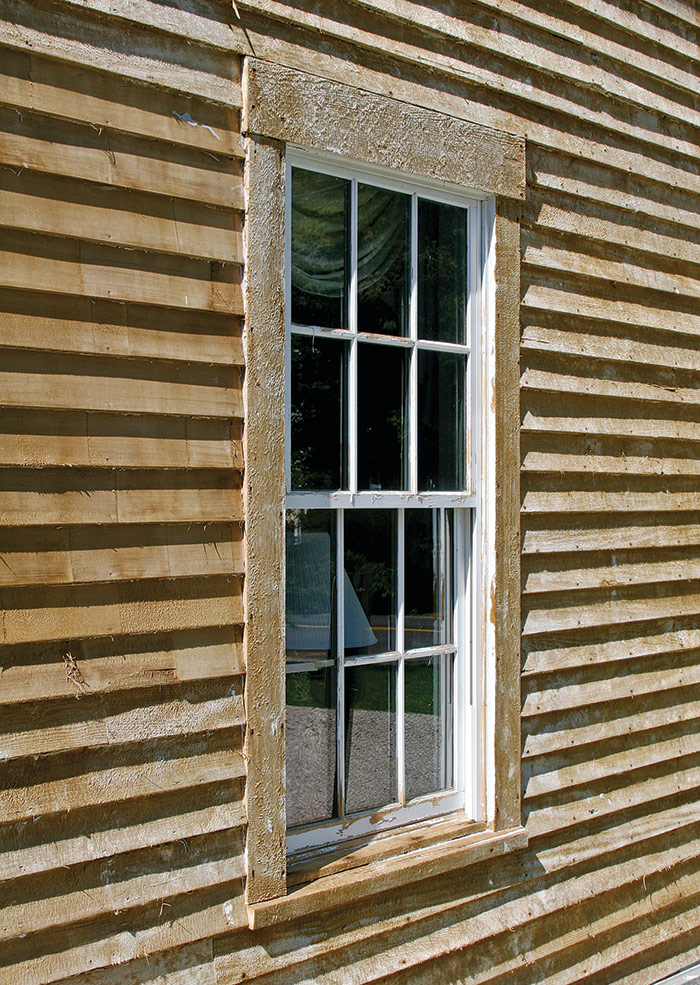
Take a look at a well-built older home with clapboard siding. Odds are that the siding courses line up with the window tops and bottoms all the way around the house. This was accomplished by varying the exposure (the amount of siding exposed from the bottom of one course to the bottom of another) of the siding courses slightly. For example, a 1⁄8-in. decrease in exposure isn’t noticeable from one course to another, but over 16 courses, for example, it adds up to 2 in.
Clapboards can be installed with a uniform exposure, but it’s worth the effort to align them with the windows. Odds are, there will be one or two windows where this won’t work, but in most cases, the windows will be uniform in size, and the clapboards can be adjusted to fit.
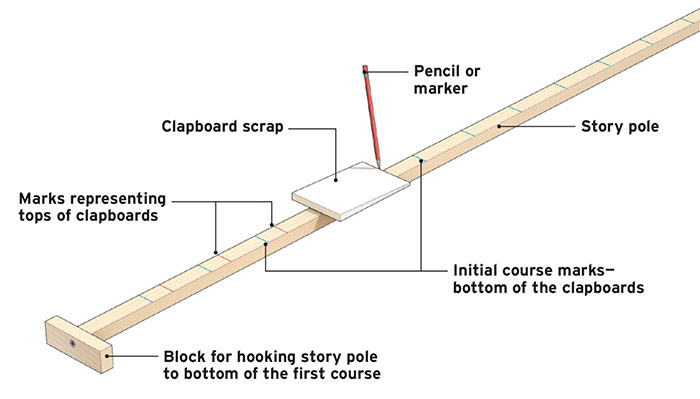
Measure from the bottom of the sheathing to the bottoms and tops of the windows and add 1⁄2 in. to 1 in. for the amount the bottom course will extend over the foundation. Photo 1 Mark those dimensions on a story pole. Measure the walls in sections—from the bottom of the siding to the bottom of the first-floor windows, from the bottoms of those windows to their tops, from the tops of the first-floor windows to the bottom of the second-floor windows, and so forth. Divide the measurements by the nominal exposure, say 4 in., to find the approximate number of courses in those sections.
For example, suppose the distance up to the bottom of the first-floor windows is 37 in. Dividing 37 by 4 yields 9.25. Round that to 9 courses. Now, divide 37 by 9 to find the course spacing of about 4 1⁄8 in. Using 5 1⁄4-in.-wide clapboards, that still provides the minimum 1 in. lap required, while aligning the ninth course with the bottom of the window.
Now, say the window measures 67 in. tall—67 divided by 4 is 16.75. Rounding up to 17 gives an exposure of 31 5⁄16 in. Rounding down to 16 courses gives an exposure of 4 3⁄16 in. Either exposure is fine, but I’d probably go with 4 3⁄16 in. because it’s closer to the 4 1⁄8-in. exposure of the clapboards below, and it saves a course of siding.
Cut a story pole the height of the wall. Calculate the exposures you’ll use, and mark them on the pole in pencil. Photo 2 Unless it’s an easy number to add in a series—say 4 1⁄2 in.—then it’s smart to do the math on a construction calculator. These marks represent the bottom of the clapboards. You want marks to locate the tops of the clapboards, though, so that you can strike a series of chalklines along the wall to guide installation. To locate the marks for the tops of the claps, simply hold a scrap of clapboard on each existing line and strike a line along the top of the scrap with a pencil. Photo 3 (Screw a block to the story pole to hook the bottom of the clap.)
Cedar siding is supposed to be nailed to the studs, although a lot of carpenters ignore this rule. I don’t, and I snap vertical chalklines on the wall where the studs are. 4 The first piece of siding to go on the wall is a starter strip, ripped from the top inch of a clapboard. 5 Nail this at the bottom of the wall, even with the bottom of the corners. 6 All the other clapboards overlay the one below, and the purpose of the starter strip is to space the bottom of the first clapboard away from the wall by the same amount.
| TRADE SECRET: When installing wood siding or trim on a wall intersecting a roof, maintain a minimum 2-in. gap between the wood and the roofing shingles. Otherwise, the wood will wick up moisture from the roof, fostering rot and peeling paint. |
Snap a chalkline to locate the top of the first clapboard, then measure the first board and cut it to length. 7 If a run is shorter than a clapboard, the most accurate way to measure is to hold it in place, fit tightly to the corner trim, and mark it in place. Then cut it on a miter saw and prime or stain the cut ends. 8 Nail the first course into the floor framing with its lower edge even with the cornerboards.
Hook the bottom of the story pole on the bottom of the first clapboard and mark the top of each course at both sides of the wall and on both sides of interruptions such as windows. 9 On runs longer than 8 ft., snap lines between the marks. On shorter walls, marking the ends will keep the courses well enough aligned.
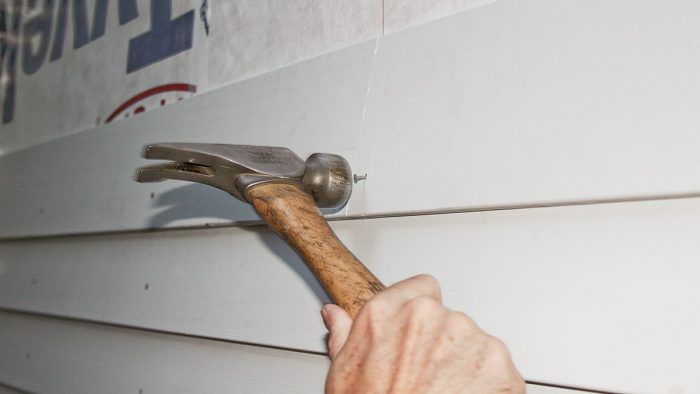
After the first course, nail succeeding courses at every stud—a bit more than 1 in. up from the bottom of the clapboard. This should be just high enough to miss the underlying clapboard. That’s important. Wood siding expands and contracts across the grain with seasonal changes in humidity. The tops of clapboards have to be free to move with these changes or the clap will crack. If the nail on the upper clap penetrates the lower board, that lower clapboard is restrained in two places and unable to move without cracking. If that crack spreads down to the exposed face of the clapboard, water can get in and cause the finish to fail. 10
Cedar siding is produced by a number of mills in different configurations and sizes. Here, I’m installing primed, finger-jointed 5 1⁄4-in. clapboard—probably the most common and economical cedar siding.
| TRADE SECRET: Cedar siding doesn’t have to be painted—it can be installed raw and last for a century. However, if it’s going to be painted or stained, it has to be coated on all six sides. If you install raw cedar, consider that a permanent choice, as any coat of paint applied to its exterior without back priming a couple of years down the road will be doomed to early failure. |
As with cornerboards, or any painted exterior wood, priming or staining the end cuts is very important. Either stain or a stain-blocking oil-base or acrylic primer is acceptable.
It’s a pain in the neck to keep an open can of primer around. Instead, put the primer in a plastic container, such as one that takeout soup from a Chinese restaurant comes in. Clean containers such as this can be had at paint stores and home centers. Slit the lid to fit the brush handle, and you’ve got a ready-to-use system that keeps the paint and the brush from drying out.
Field joints in clapboards are inevitable, and they should be scarfed. Make the cuts on a miter saw. Prime the ends, and nail both boards. To avoid cracking the clapboards, predrill when nailing near the ends.

Excerpted from Carpentry Complete: Expert Advice from Start to Finish, by Andy Engel
Available at Amazon.com .
Sign up for eletters today and get the latest how-to from Fine Homebuilding, plus special offers.